Building a dispatcher agnostic view-model

If you are writing multithread Windows apps (and if you are not, you should!), you know by now that any code related to the UI must run in the main thread (also called UI thread).

Knowing this, please look at the following view-model:

// Basic implementation of the INotifyPropertyChanged interface

public abstract class BaseViewModel : INotifyPropertyChanged
{
public event PropertyChangedEventHandler PropertyChanged;

protected void OnPropertyChanged([CallerMemberName] string propertyName = null)
{
PropertyChanged?.Invoke(this, new PropertyChangedEventArgs(propertyName));
}
}

// The main view-model

public class MainViewModel : BaseViewModel
{
private string _result;

public string Result
{
get { return _result; }
set
{
_result = value;
OnPropertyChanged("Result");
}
}

public async Task RetrieveData()
{
var data = await GetDataFromSomeWebsite()
.ConfigureAwait(false);

Result = data;
}

// More code will go here...
}

The BaseViewModel is just a basic implementation of the INotifyPropertyChanged interface with a helper method that will raise the PropertyChanged event - all quite standard for any MVVM based application!

Now let us say that in the view we have a TextBox control, and that the Text property is binded to the MainViewModel.Result property.

Given this, you will probably notice a problem with the MainViewModel.RetrieveData method: after awaiting the call to GetDataFromSomeWebsite method, most likely we will not be on the UI thread due to the .ConfigureAwait(false) (if you dont know what ConfigureAwait is, please read this post). So, when we set the Result property on the next line which in turn will notify the UI that the property value has changed, that will cause an exception!

To fix it, we can use CoreApplication.MainView.Dispatcher to retrieve a CoreDispatcher instance that will then allow us to execute code in the UI thread.

With some minor changes, the MainViewModel.RetrieveData method now looks something like this:

public async Task RetrieveData()
{
var data = await GetDataFromSomeWebsite()
.ConfigureAwait(false);

CoreApplication.MainView.Dispatcher(CoreDispatcherPriority.Normal, () =>
{
Text = data;
});
}

For small view-models this approach is perfectly fine, but for bigger ones where multiple developers are working on, you might end up losing track of which properties you need to update in the UI thread and the ones you do not.

Wouldn’t it be great if you just didn’t have to worry about this?

To make our view-models completely oblivious of what is the current thread, we will need to make some changes to their base view-model!

The easiest way will be to capture the CoreDispatcher at start, and on the OnPropertyChanged method (or whatever you called your PropertyChanged event raising helper method), check if we need to dispatch the call or just raise the property regularly.

Here is our new and improved BaseViewModel:

public abstract class DispatcherAgnosticBaseViewModel : INotifyPropertyChanged
{
public event PropertyChangedEventHandler PropertyChanged;

private CoreDispatcher _dispatcher = CoreApplication.MainView.Dispatcher;

protected void OnPropertyChanged([CallerMemberName] string propertyName = null)
{
if (_dispatcher.HasThreadAccess)
{
PropertyChanged?.Invoke(this, new PropertyChangedEventArgs(propertyName));
}
else
{
_dispatcher.RunAsync(CoreDispatcherPriority.Normal, () =>
{
PropertyChanged?.Invoke(this, new PropertyChangedEventArgs(propertyName));
});
}
}
}

Notice that the first this we do is to check the CoreDispatcher.HasThreadAccess property; this property will return true if we are now on the UI thread, or false if we are not.

If we are, we can just raise the PropertyChanged event directly, but when we are not, we will do it by dispatching the call through the UI thread.

Now all we now need is to have every single view-model to inherit from this base class and we will never have to worry again about the dispatcher!

Well… not interely accurate, but I’ll leave that for another post ;)

Compiled Bindings considerations III

Two years since my Compiled Bindings considerations II article, I can finally write a part III that actually comes with some good news!

The earlier article focused on a really nasty bug with the compiled bindings ignoring the FallbackValue when the binding path didn’t resolve.

It now seems that Microsoft finally fixed this bug on the Windows 10 SDK Preview Build 17069, and this fix will eventually make it’s way to the next stable release of the Windows 10 SDK!

There is, however, a small requirement to make this work: the compiled binding expression must have the FallbackValue set.

To better understand it, please check this line of code taken from the example in the part II article:

<TextBlock Style="{StaticResource BodyTextBlockStyle}" Text="{x:Bind ViewModel.CurrentTime.CurrentTimeTicks, Mode=OneWay}" />

On the above, we will now add FallbackValue={x:Null} to the binding expression:

<TextBlock Style="{StaticResource BodyTextBlockStyle}" Text="{x:Bind ViewModel.CurrentTime.CurrentTimeTicks, Mode=OneWay, FallbackValue={x:Null}}" />

This will ensure that this TextBlock gets the text cleared when the binding can’t resolve the path or source!

A classic binding does this by default (when FallbackValue isn’t set, it will just use null), but for compiled bindings, we need to specify a value.

More “hard work”, but a solution to the problem, nevertheless!

Code tips to keep the UI responsive

I have taken a break from UWP development, and for the last couple of weeks I have been working mostly on WPF projects.

You know, that “old” XAML technology that started back when Windows XP was still a thing!

The interesting bit is that all my previous experience developing for Windows Phone did give me a lot of knowledge on how to write performant non-blocking code - and I am still learning something new every day!

These are some of my personal coding tips to help keep your app as responsive as possible!

Execute CPU bound code on a separate thread

Consider the following example:

private void CalculateButton_OnClick(object sender, RoutedEventArgs e)
{
var total = MyLongRunningOperation();

ResulTextBlock.Text = total.ToString();
}

The above code sample will run on the UI thread, and as it takes a while to run the MyLongRunningOperation method, it will make the app unresponsive until it finishes.

This is a perfect example of what CPU bound code is: code that should execute on a separate thread as to avoid blocking the UI thread while it runs.

There are a few ways to fix this problem and the easiest one is to just use Task.Run.

Now look at this alternative:

private async void CalculateButton_OnClick(object sender, RoutedEventArgs e)
{
var total = await Task.Run(() => MyLongRunningOperation());

ResulTextBlock.Text = total.ToString();
}

On the above code sample, we wrapped the call to MyLongRunningOperation method with a Task.Run that will force it to execute on a new separate thread, and then awaited for it to complete.

Note: Libraries should not lie about what they are doing! The UI thread is the only one that needs the asynchronous API, so it should be up to the end developer to decide when to use this, not 3rd party libraries ones!

Avoid using task.Result or task.Wait()

If use task.Result or call task.Wait() you will be blocking the current thread until that task completes, which is not ideal especially if the thread is the main UI thread!

A particular situation I see people doing this is for constructors; here’s an example:

public class TestClass
{
private int _initialValue;

public TestClass()
{
_initialValue = GetInitialValueTask().Wait(); // don't do this!
}

public int GetInitialValueDoubled()
{
return _initialValue * 2;
}

// other code...
}

The whole point of the .NET asynchronous model is to use the async and await keywords!

To avoid this issue, one could write the code like this:

public class TestClass
{
private Task<int> _initialValueTask;

public TestClass()
{
_initialValueTask = GetInitialValueTask(); // store the async task
}

public async Task<int> GetInitialValueDoubled()
{
var value = await _initialValueTask;

return value * 2;
}

// other code...
}

Instead of blocking the thread like we did before, we just store the asynchronous task and when we need it, we ensure we access it from an async method so we can await on it!

Use task.ConfigureAwait(false) whenever possible

Developers should assume that the await keyword will make any call return to calling thread.

Consider the following sample code:

private async void CalculateButton_OnClick(object sender, RoutedEventArgs e)
{
await IoBoundOperation();

await AnotherIoBoundOperation();

ResultTextBlock.Text = "Done!";
}

Both IoBoundOperation and AnotherIoBoundOperation have IO bound code, so they will most likely execute on separate threads.

Once these awaited calls finish and return, execution might resume on the calling thread, which in this case is the UI thread.

However, most likely this isn’t required, and we could just carry on execution on the same background thread.

Now look at the modified version of the sample code:

private async void CalculateButton_OnClick(object sender, RoutedEventArgs e)
{
await IoBoundOperation()
.ConfigureAwait(false);

await AnotherIoBoundOperation()
.ConfigureAwait(false);

Dispatcher.RunAsync(CoreDispatcherPriority.Normal, () =>
{
ResulTextBlock.Text = total.ToString();
});
}

We have now added .ConfigureAwait(false) to each awaited call as to avoid marshaling back to the calling thread.

Any code that needs to run on the UI thread (normally, to update the UI) can do so by using the Dispatcher.RunAsync method as seen above.

Consider using Deferred Events for your custom events

The rule of thumb on the asynchronous code is to avoid async void methods as much as possible, but for event handlers, there is no way to bypass this.

A while back I created the DeferredEvents NuGet package to mitigate this issue; at the time, I wrote an article that I now recommend reading to further understand the problem and my proposed solution.

Windows Developer Day

On October 10, Microsoft is hosting the Windows Developer Day here in London, and you can watch the live stream starting at .

The event will start with a keynote by Kevin Gallo and members of the Windows engineering team, followed by a live-streamed Q&A session and several streaming sessions diving deeper into what’s new for developers in the Windows 10 Fall Creators Update.

You might also want to check if there’s a viewing party in your area (check on the bottom of this post).

And if you’re around London on the next day…

… come to the next Windows Apps London meetup at and meet the Windows engineering team!

This is a relaxed in-person event, where you’ll get to ask a few more questions after the main Windows Developer Day!

Please check here for more details and registration.

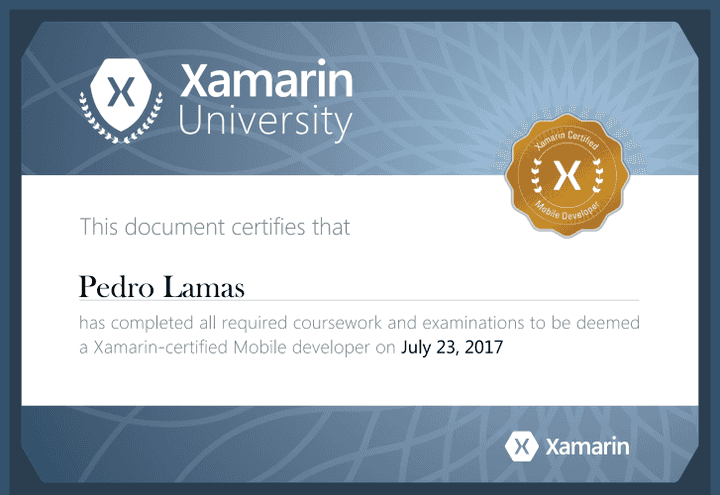
Xamarin Certified Mobile Developer

A couple of weeks ago I decided to enroll into Xamarin University and after a few classes and a final exam, I’m now a Xamarin Certified Mobile Developer!

Xamarin Certified Mobile Developer certificate

I love Windows Development and make no mistake: I intend to keep writing and working with full native UWP!!

But at this time it makes complete sense for someone who works with XAML and C# to also learn Xamarin, as this is the best Microsoft has for cross-platform development!

Xamarin University was a really good experience and I can definitely recommend it to everyone: people that just started coding with .NET and C#, experienced developers who want to learn Xamarin, or professional developers that just want to get Xamarin certified!

Windows Phone is (officially) dead!

Over the last few months years quite a few people have written about the Windows Phone demise.

However, according to Microsoft’s Support Page for product life cycle, the “Mainstream Support End Date” for Windows Phone 8.1 is July 11, 2017… so that’s basically, tomorrow!

Microsoft’s last update for the WP8.x operating system (dubbed “Update 2”) was more than 2 years ago… so even if the “official” support only now ended, I think we can all agree that unofficially Microsoft abandoned the OS a long time ago (mostly when they replaced it with Windows 10 Mobile).

My own experience with Windows Phone

Microsoft announced Windows Phone 7 at the Mobile World Congress in Barcelona, Spain, on February 15, 2010; I remember that the more I saw those screens and learned about the promised capabilities and technical details, the more I knew that I wanted to build apps for it, both as a hobby and professionally - and do so I did!!

When they released the first Windows Phone devices on October 21, 2010 in Europe, I went straight to a local shop and bought my very first Windows Phone: the magnificent Samsung Omnia 7.

Soon after that, Microsoft and Nokia got into a partnership to boost the operating system footprint, and as a consequence I ended up leaving Portugal and moving to Bristol UK to join the Nokia Music division, later known as MixRadio!

Nokia’s first Windows Phone was the Lumia 800, one of the best phones I have ever owned (I actually kept one of these as a souvenir)

By my account, throughout the years I owed and used at least 12 different Windows Phone devices, mostly due to my time as Nokia employee.

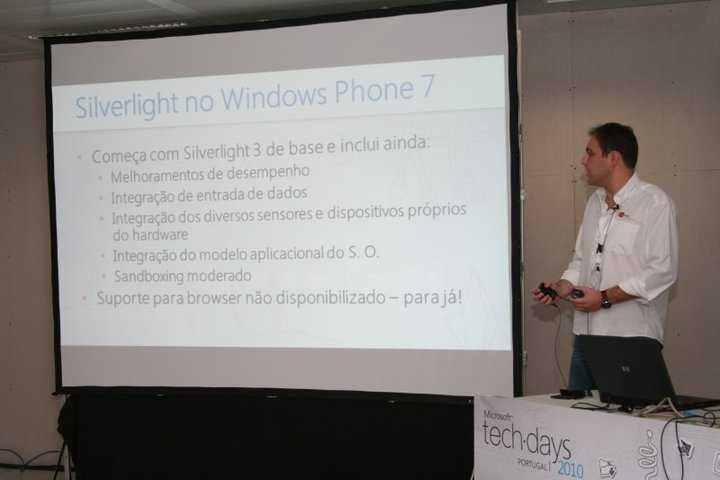
I also got to do a lot tech-talks on Windows Phone development, and participated in a few hackathons, helping the young and brightest with their projects.

Windows Phone 7 development with Silverlight - Microsoft Techdays Portugal 2010

“The King is dead, long live the King!”

Microsoft arrived late to the “mobile party” and made lots of mistakes (the lack of software upgrades for “older” devices, some less than a year old, being the biggest), but it was the lack of true first-party apps that caused users to lose interest in the phones and doomed the mobile operating system.

Windows 10 makes good on the promise of “one Windows for all devices”, but the mobile flavor never did get the same praise as the Windows Phone did - and I strongly agree with that!

I enjoyed all my Windows Phone devices, and I will miss using them a lot… but life goes on!

Farewell, Windows Phone.

Cimbalino Toolkit 2.5.0

Yesterday I released Cimbalino Toolkit version 2.5.0!

Here’s what’s changed on this version:

  • Cimbalino.Toolkit.Core now targets the .NET Standard 1.0
  • Cimbalino.Toolkit.Core will now behave as the rest of the toolkit in regards to throwing NotImplementedExceptions only on specific cases
  • Exposed overrideable async methods in ExtendedPageBase
  • Other fixes and improvements

From the above, I’d like to emphasise the huge advantage of supporting .NET Standard 1.0: this means you can now use Cimbalino.Tookit.Core in all .NET platforms: .NET Framework, .NET Core, and Mono!

CultureInfo changes in UWP - Part 2

A while back I wrote an article about the CultureInfo changes in UWP and how they affected the UWP apps.

Well, things haven’t changed much since then, and the information in that article still stands today!

However, Microsoft has since open-sourced the .NET Core Runtime (CoreRT), and that allowed me to take a peek under the hood to understand what is going on.

While looking at the CultureInfo.cs code, I noticed the following comment on the CurrentCulture property:

We use the following order to return CurrentCulture and CurrentUICulture

  • Use WinRT to return the current user profile language
  • Use current thread culture if the user already set one using CurrentCulture/CurrentUICulture
  • Use thread culture if the user already set one using DefaultThreadCurrentCulture or DefaultThreadCurrentUICulture
  • Use NLS default user culture
  • Use NLS default system culture
  • Use Invariant culture

This confirms our findings!

Looking on the CultureInfo.Windows.cs partial class, I noticed the #if ENABLE_WINRT on the top, which forces the first rule on that comment!

Further down in the same file, we find a GetUserDefaultCulture method which uses the GetLocaleInfoEx Win32 API to retrieve the locale name.

This Win32 API is actually allowed for apps published to the Windows Store!

Retrieving the “proper” CurrentCulture, the proper way!

In my previous article on this subject, I found a hack where one could retrieve the “proper” CurrentCulture using the DateTimeFormatter class.

But with all this new information, I have now created a non-hacky way of doing the same:

using System.Globalization;
using System.Runtime.InteropServices;
using System.Text;

public class CultureInfoHelper
{
[DllImport("api-ms-win-core-localization-l1-2-0.dll", CharSet = CharSet.Unicode)]
private static extern int GetLocaleInfoEx(string lpLocaleName, uint LCType, StringBuilder lpLCData, int cchData);

private const uint LOCALE_SNAME = 0x0000005c;
private const string LOCALE_NAME_USER_DEFAULT = null;
private const string LOCALE_NAME_SYSTEM_DEFAULT = "!x-sys-default-locale";

private const int BUFFER_SIZE = 530;

public static CultureInfo GetCurrentCulture()
{
var name = InvokeGetLocaleInfoEx(LOCALE_NAME_USER_DEFAULT, LOCALE_SNAME);

if (name == null)
{
name = InvokeGetLocaleInfoEx(LOCALE_NAME_SYSTEM_DEFAULT, LOCALE_SNAME);

if (name == null)
{
// If system default doesn't work, use invariant
return CultureInfo.InvariantCulture;
}
}

return new CultureInfo(name);
}

private static string InvokeGetLocaleInfoEx(string lpLocaleName, uint LCType)
{
var buffer = new StringBuilder(BUFFER_SIZE);

var resultCode = GetLocaleInfoEx(lpLocaleName, LCType, buffer, BUFFER_SIZE);

if (resultCode > 0)
{
return buffer.ToString();
}

return null;
}
}

All you need is to copy the above to a file in your UWP project, and then call CultureInfoHelper.GetCurrentCulture().

I strongly advise using this new method instead of the “hack” I used in my previous article, as this is the same one that the .NET Framework relies on to retrieve the CurrentCulture information!